A Running Case Using the MuPRO SDK Library: demo1#
1. Program Introduction#
This program is used to demonstrate how we can use the already installed MuPRO SDK library and implement some of our requirements based on this library.
The execution process of demo is as follows
Initialize the project environment and load the MuPRO SDK configuration
Create a 3D data file and store it for subsequent programs to read in input data from the file
Read 3D data files and perform some fast Fourier transforms
Store the results of the Fast Fourier Transform in an output file
Next, we will introduce this case program from multiple perspectives
2. Cmakelists design#
Before implementing demo1, we need to import the MuPRO SDK package, which carries the required SDK library dependencies.
2.1 Some pre compiler settings#
Do not hardcode compilers in the example. Select the compiler with your CMake preset, toolchain file, or environment before configuring the example.
source /opt/intel/oneapi/setvars.sh
2.2 Build Project Information#
Set project name, project introduction, project language, and other information
project(
  demo1
  DESCRIPTION "MuPRO SDK demo1 example"
  LANGUAGES Fortran)
2.3 Activate MPI environment#
If you have not yet installed OneAPI, please refer to the OneAPI installation tutorial. If you have already installed the oneAPI, please make sure to activate the environment variables of the oneAPI before building, so that the program can detect related dependencies.
Execute the following instructions specifically, and the path of the oneAPI is determined by the location where you installed it
source /home/lby/intel/oneapi/setvars.sh
Even if you have executed the above instructions, cmake still cannot detect the setting of mpi. You can choose to manually set MKL_DIR in Cmakelists_ The path of the variable is as follows
set(MKL_DIR /home/lby/intel/oneapi/mkl/latest/lib/cmake/mkl)
2.4 Import MuPRO SDK dependency library#
Firstly, ensure that you have installed or built the MuPRO SDK library correctly on your device. If it is not installed, build and install the SDK library first.
Compile the MuPRO SDK library to the out folder, which is the debug environment
cmake --preset="linux-Debug" .
Enter Compilation Directory
cd out/build/debug/
Execute Compilation and Install
ninja && ninja install
Then we can use CMake find_package to find the mupro::mupro library.
Note that this example requires CMake 3.20 or newer.
Add
CMAKE_PREFIX_PATHto Cmakelists to facilitate finding the installation path for the MuPRO SDK librarycmake -DCMAKE_PREFIX_PATH=/path/to/mupro/install ..
Use
find_packageto find the MuPRO SDK libraryfind_package(mupro REQUIRED)
2.5 Add additional dependencies for the project#
==demo1== uses to read data from a file and initialize it, so an
input.tomlfile is required as one of the input sourcesconfigure_file(${CMAKE_CURRENT_SOURCE_DIR}/input.toml ${CMAKE_CURRENT_BINARY_DIR}/input.toml COPYONLY)
We will also name the executable file demo, and its related dependency libraries are as follows
add_executable(demo main.f90 lib.f90) target_link_libraries(demo PUBLIC mupro::mupro) set_target_properties(demo PROPERTIES LINKER_LANGUAGE Fortran)
Obviously,
main.f90, as the entry point of our program, relies on theMuPRO SDKandlib.f90files
2.6 The complete Cmakelists file is as follows#
cmake_minimum_required(VERSION 3.20)
project(
demo1
DESCRIPTION "MuPRO SDK demo1 example"
LANGUAGES Fortran)
find_package(mupro REQUIRED)
configure_file(${CMAKE_CURRENT_SOURCE_DIR}/input.toml
               ${CMAKE_CURRENT_BINARY_DIR}/input.toml
               COPYONLY)
add_executable(demo main.f90 lib.f90)
target_link_libraries(demo PUBLIC mupro::mupro)
set_target_properties(demo PROPERTIES LINKER_LANGUAGE Fortran)
3. Code Interpretation#
1. main.f90#
This part of the code is mainly responsible for calling the methods defined in lib.f90 and organizing them into the program process we designed
2. lib.f90#
This part of the code is responsible for implementing the core business. Contains the following sub program modules
print_SizeContext(context)
init_project(context, input_toml)
fft_handle(outArr)
test_forward_backward(test_epoch, check_num, outArr)
generate_3d_data(fileName, kt, arr3d)
read_3d_data(filename, kt, outArr)
write_3d_to_file(outFilename, kt, outArr)
subroutine |
meanning |
usage |
|---|---|---|
print_SizeContext |
Print detailed information in type_mupro_SizeContext |
|
init_project |
Initialize fft environment settings and mpi settings |
|
fft_handle |
Processing Fast Fourier Transform |
|
test_forward_backward |
Backward processing of fast Fourier transform |
|
generate_3d_data |
Generate 3D test data files for data input |
|
write_3d_to_file |
Write 3D data to a file |
|
4. Program Usage#
Build and compile the project
cd examples/demo1/
mkdir build
cd build
cmake ..
make
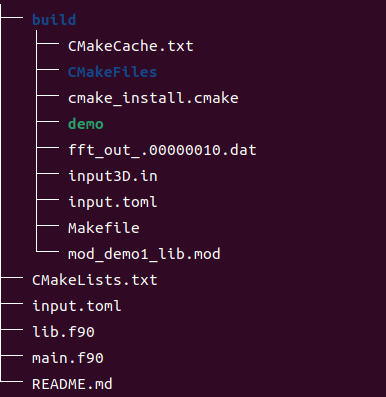
The compiled running result is as follows
Executing executable programs
./demo
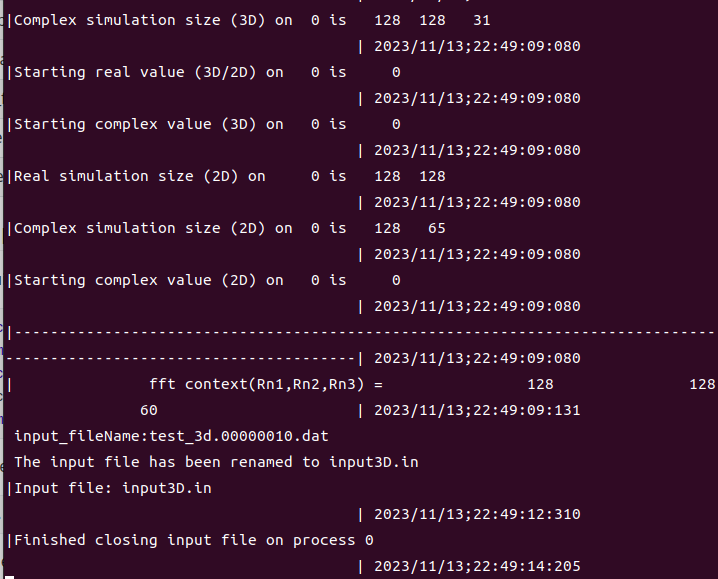
The screenshot of the operation is as follows: